
Build your first expression map
Create a Cubase expression map from a curated knowledge-base patch in under a minute, then download the .expressionmap file.
By the end of this page you'll have a working .expressionmap file for a real library patch — every articulation named, grouped, coloured, and wired to the correct MIDI output. The fastest path is to start from a knowledge-base patch; everything is already tagged and the default outputs are filled in.
This video is hosted on YouTube
Loading it lets YouTube set cookies and receive your IP address. Accept external media to watch it here — see our Cookie Policy.
Before you start
- The library is acquired under My Library.
- The Cubase MIDI Remote bridge is paired (only required if you want to test the map live — not for export).
Steps
Create a map from a knowledge-base patch
Two ways in:
- From the Search catalogue: open the patch's detail view and click Create map from this patch.
- From the map editor: go to
/map-editor/newand pick the patch from the From knowledge base picker.
DawForge generates a draft map: every articulation in the patch becomes a row, with the curated tags applied and the library's default MIDI output rule wired up (e.g., CC 32 for Spitfire UACC libraries).
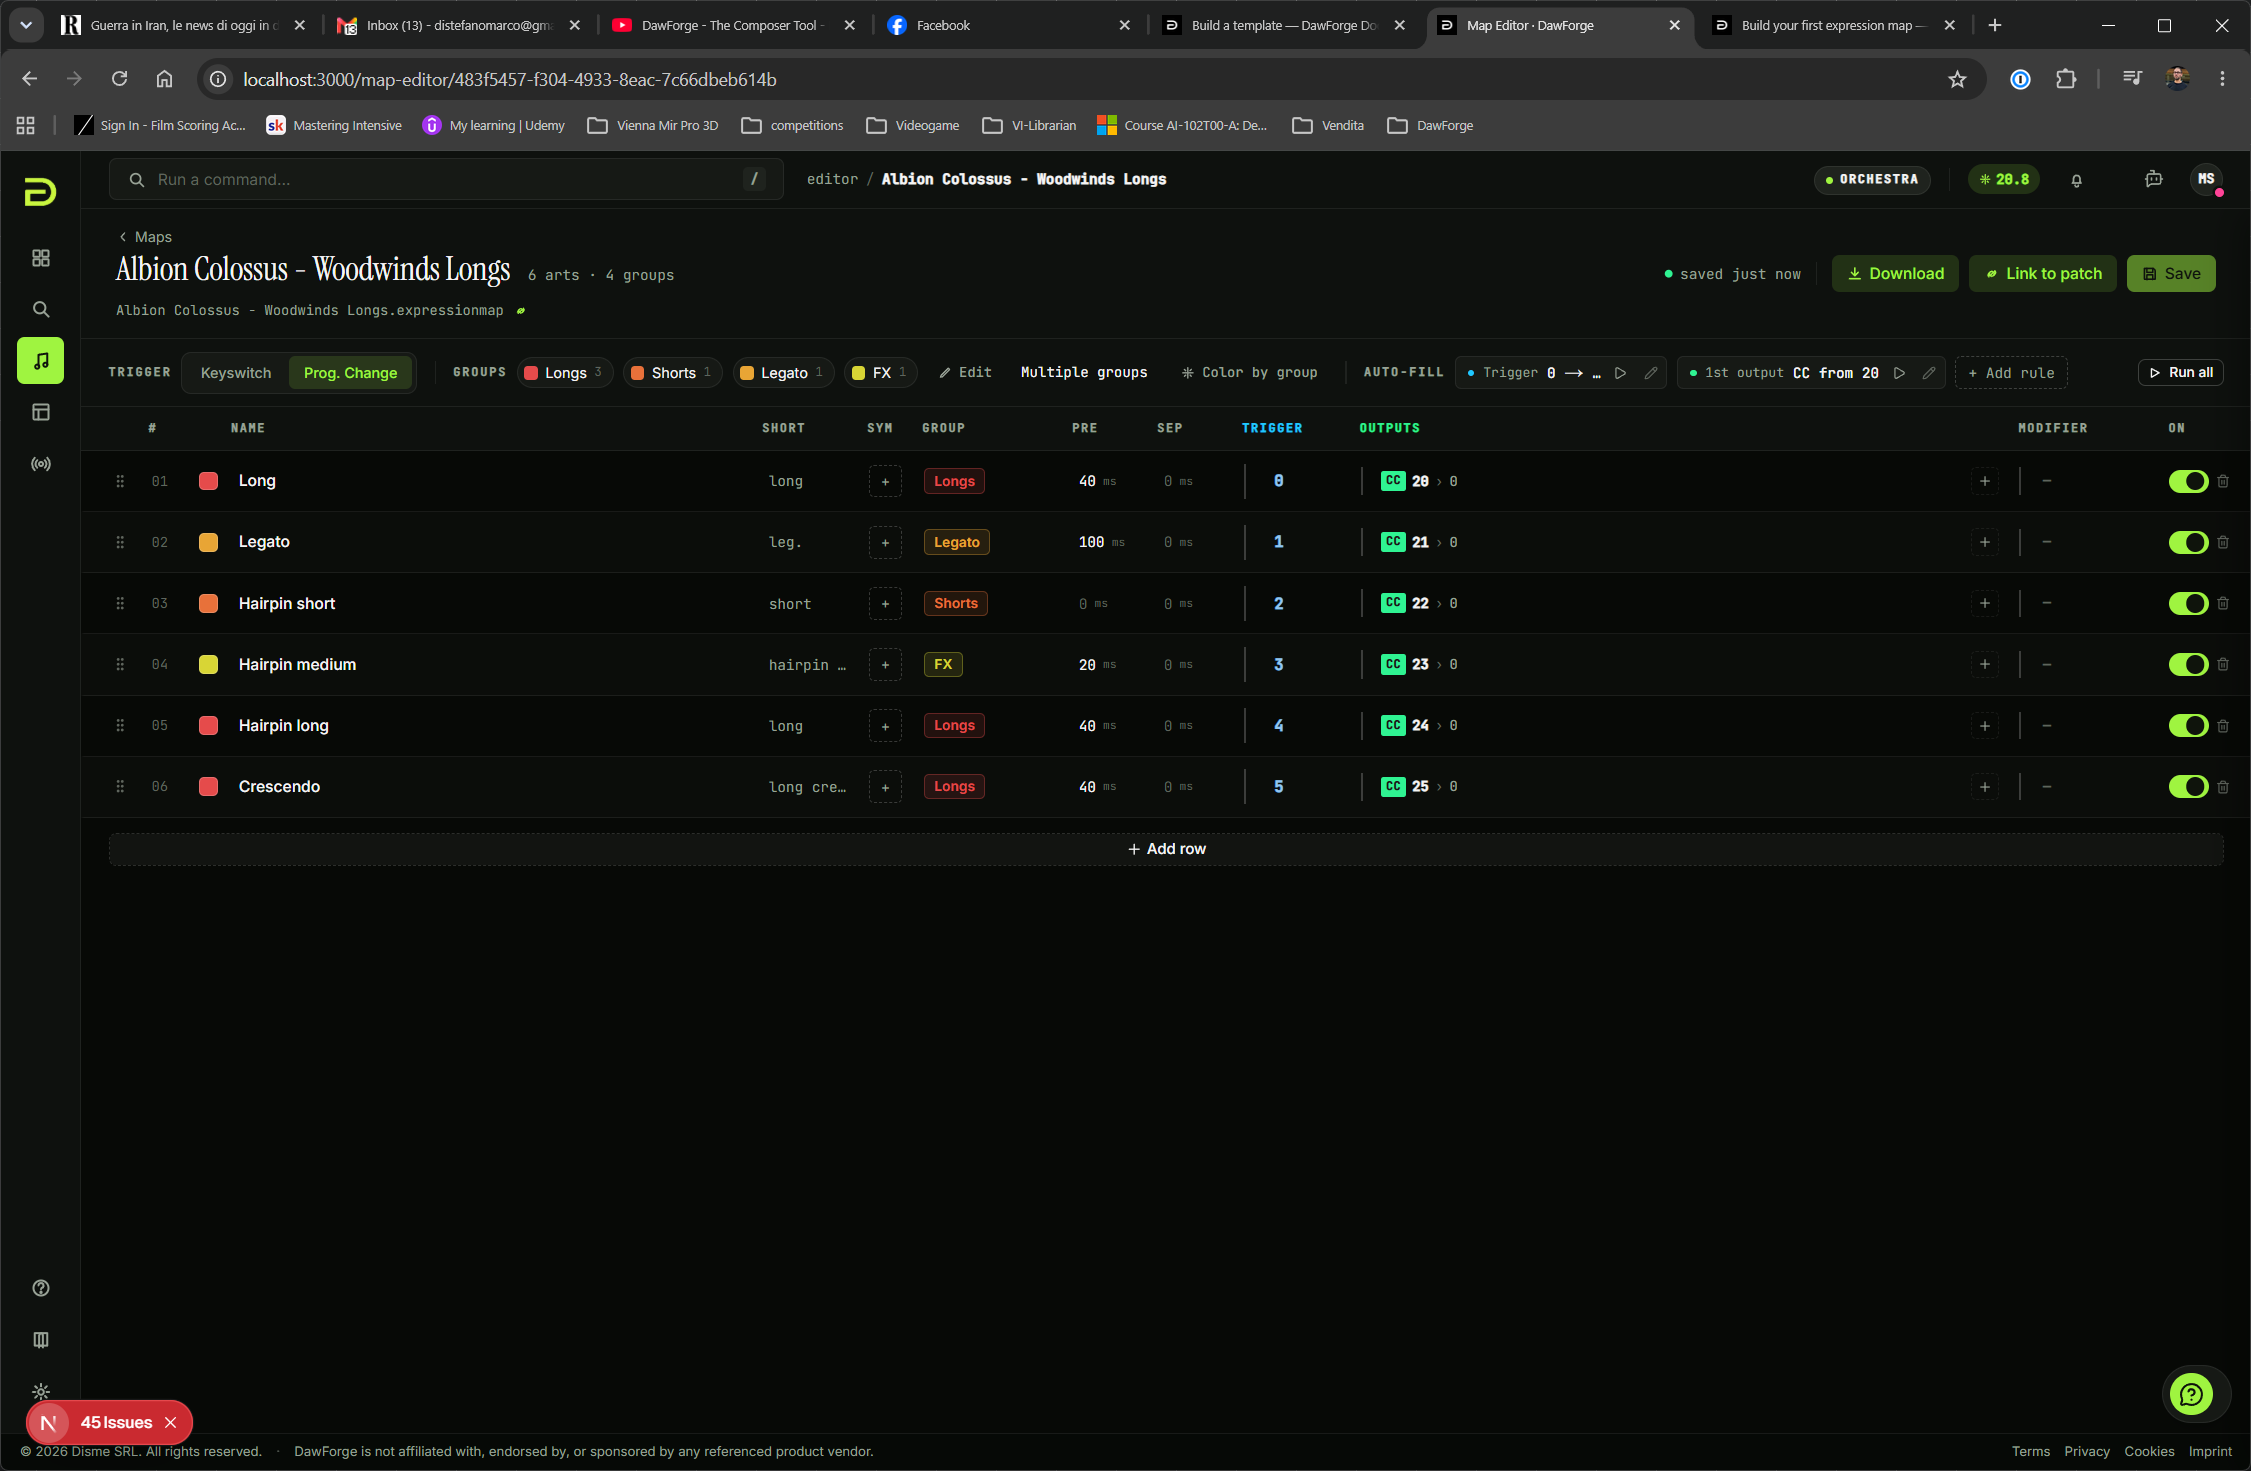
Review the articulation list
Each row is one articulation. The relevant columns:
- Name — what shows in Cubase's Inspector. Edit freely.
- Display — the short name Cubase shows above each note in the score view. DawForge derives one automatically; override if you want.
- Tags — the canonical tag categories (length, technique, style, pattern, dynamic) that drive search and matching.
- Group — Cubase's articulation group (0–3), used for the visual lane in the score editor.
- Slot type —
Attribute(sticks until changed) orDirection(one-shot). - Remote key — the MIDI note that triggers this articulation when you play.
- Output — what DawForge sends to your library when the articulation fires. Most rows already have it filled in.
Add a row with the + button, drag rows to reorder, and click the eye icon to disable a row (it's kept in the file but stripped from the export).
Set the remote keys
If you want to switch articulations with key switches from your controller, assign a unique remote key per row. The default layout starts at C-1 and walks up by semitone.
If you'd rather drive switches from the DawForge web app (Flow) than from a controller, remote keys are still useful — Flow sends them under the hood — but you don't need to memorise them.
Save and download
Click Save. To use the map in Cubase, click Download to grab the .expressionmap file, then in Cubase:
- Open the Inspector for any MIDI track.
- In the Articulations section, click the map slot and choose Load.
- Pick the file you just downloaded.
Verify it worked
Load the map onto a track in Cubase, drop a few MIDI notes, and assign articulations from the Inspector. The notes should play with the technique you assigned. If you wired up remote keys, playing the corresponding note on your controller should also switch the active articulation.
If something went wrong
- Articulations show in Cubase but make no sound change → your library isn't responding to the configured output. Double-check the output type and value (CC number, keyswitch note) against your library's documentation.
- "Group" lane is empty in the Cubase score editor → group is set to a value Cubase doesn't render. Stick to 0–3.
- Editor shows a draft but Save fails → you're at your plan's stored-maps cap. Drop an unused map or upgrade.