
Flow — Cubase setup
The full Flow setup for Cubase — the link, the presets, articulation switching, and first-run checks.
Flow is DawForge's live link to Cubase: track selection follows you both ways, articulation switches fire as you play, and solo / show / hide cascade through your folder structure. This page assumes you've already done the one-time setup (Install and connect Cubase) and have a template ready. If not, do those first.
This video is hosted on YouTube
Loading it lets YouTube set cookies and receive your IP address. Accept external media to watch it here — see our Cookie Policy.
How it works, in one paragraph
When you click a track in Flow, DawForge tells Cubase to select the track by name using a small Cubase preset. Because it matches on the name, it finds the track wherever it lives — at any distance, inside folders, even when hidden — which is something Cubase's own "next track" stepping can't do. The same trick powers solo, show, and hide. You install those presets once per template (the next section), and from then on Flow just works.
Steps
Confirm Cubase is linked
Open Studio → Studio Setup → MIDI Remote → MIDI Remote Manager. DawForge Bridge should be listed with a green status and both its MIDI input and output set to the DawForge Bridge port. If not, run through Install and connect Cubase.
Set up the template with Connect Cubase
Open /flow, pick your template, and click Connect Cubase in the top bar (the button enables once a template is selected). It opens a guided three-step wizard — the header is clickable, so jump straight to whatever you still need:
- MIDI Remote bridge — the one-time link between Cubase and DawForge. If you already followed Install and connect Cubase, this is done; skip it.
- Logical Editor presets — the per-template presets that let Flow select / show / hide / solo your tracks by name. This is the step you run for each template.
- Track Archive — download the template's
.xmlto build the project in Cubase if you haven't already (covered in the next step).
Installing the presets (step 2): click Install presets. The first time, your browser asks for permission to a folder — choose Cubase's preset folder:
C:\Users\<You>\Documents\Steinberg\Cubase\User Presets\Project Logical Editor\/Users/<You>/Documents/Steinberg/Cubase/User Presets/Project Logical Editor/DawForge writes the presets into a DawForge folder there and remembers the location, so future installs are silent — no prompt:
Cubase 15 picks the presets up live — no restart. (Older Cubase versions may need a restart.)
Using Safari or Firefox? Each install step offers a Download zip instead button (only Chrome and Edge can write to a folder for you). Unzip so the DawForge folder lands inside the Project Logical Editor folder above. The result is the same.
These presets are tied to the track names in the template at install time. Rename a track in Cubase without re-importing the template and re-running Connect Cubase → Install presets, and that track drops out of Flow's reach.
Open the Cubase project that matches the template
Flow finds tracks by name, so the Cubase project you open must have the same track names as the template — usually the very project you exported the template from.
Open Flow and check the connection
Back on /flow, confirm:
- The status bar shows
Connected. - The left rail mirrors your Cubase folder structure.
- The track selected in Cubase is highlighted in the rail.
- Clicking a row in the rail moves the selection in Cubase.
- Clicking an articulation cell switches the active articulation on the playing track.
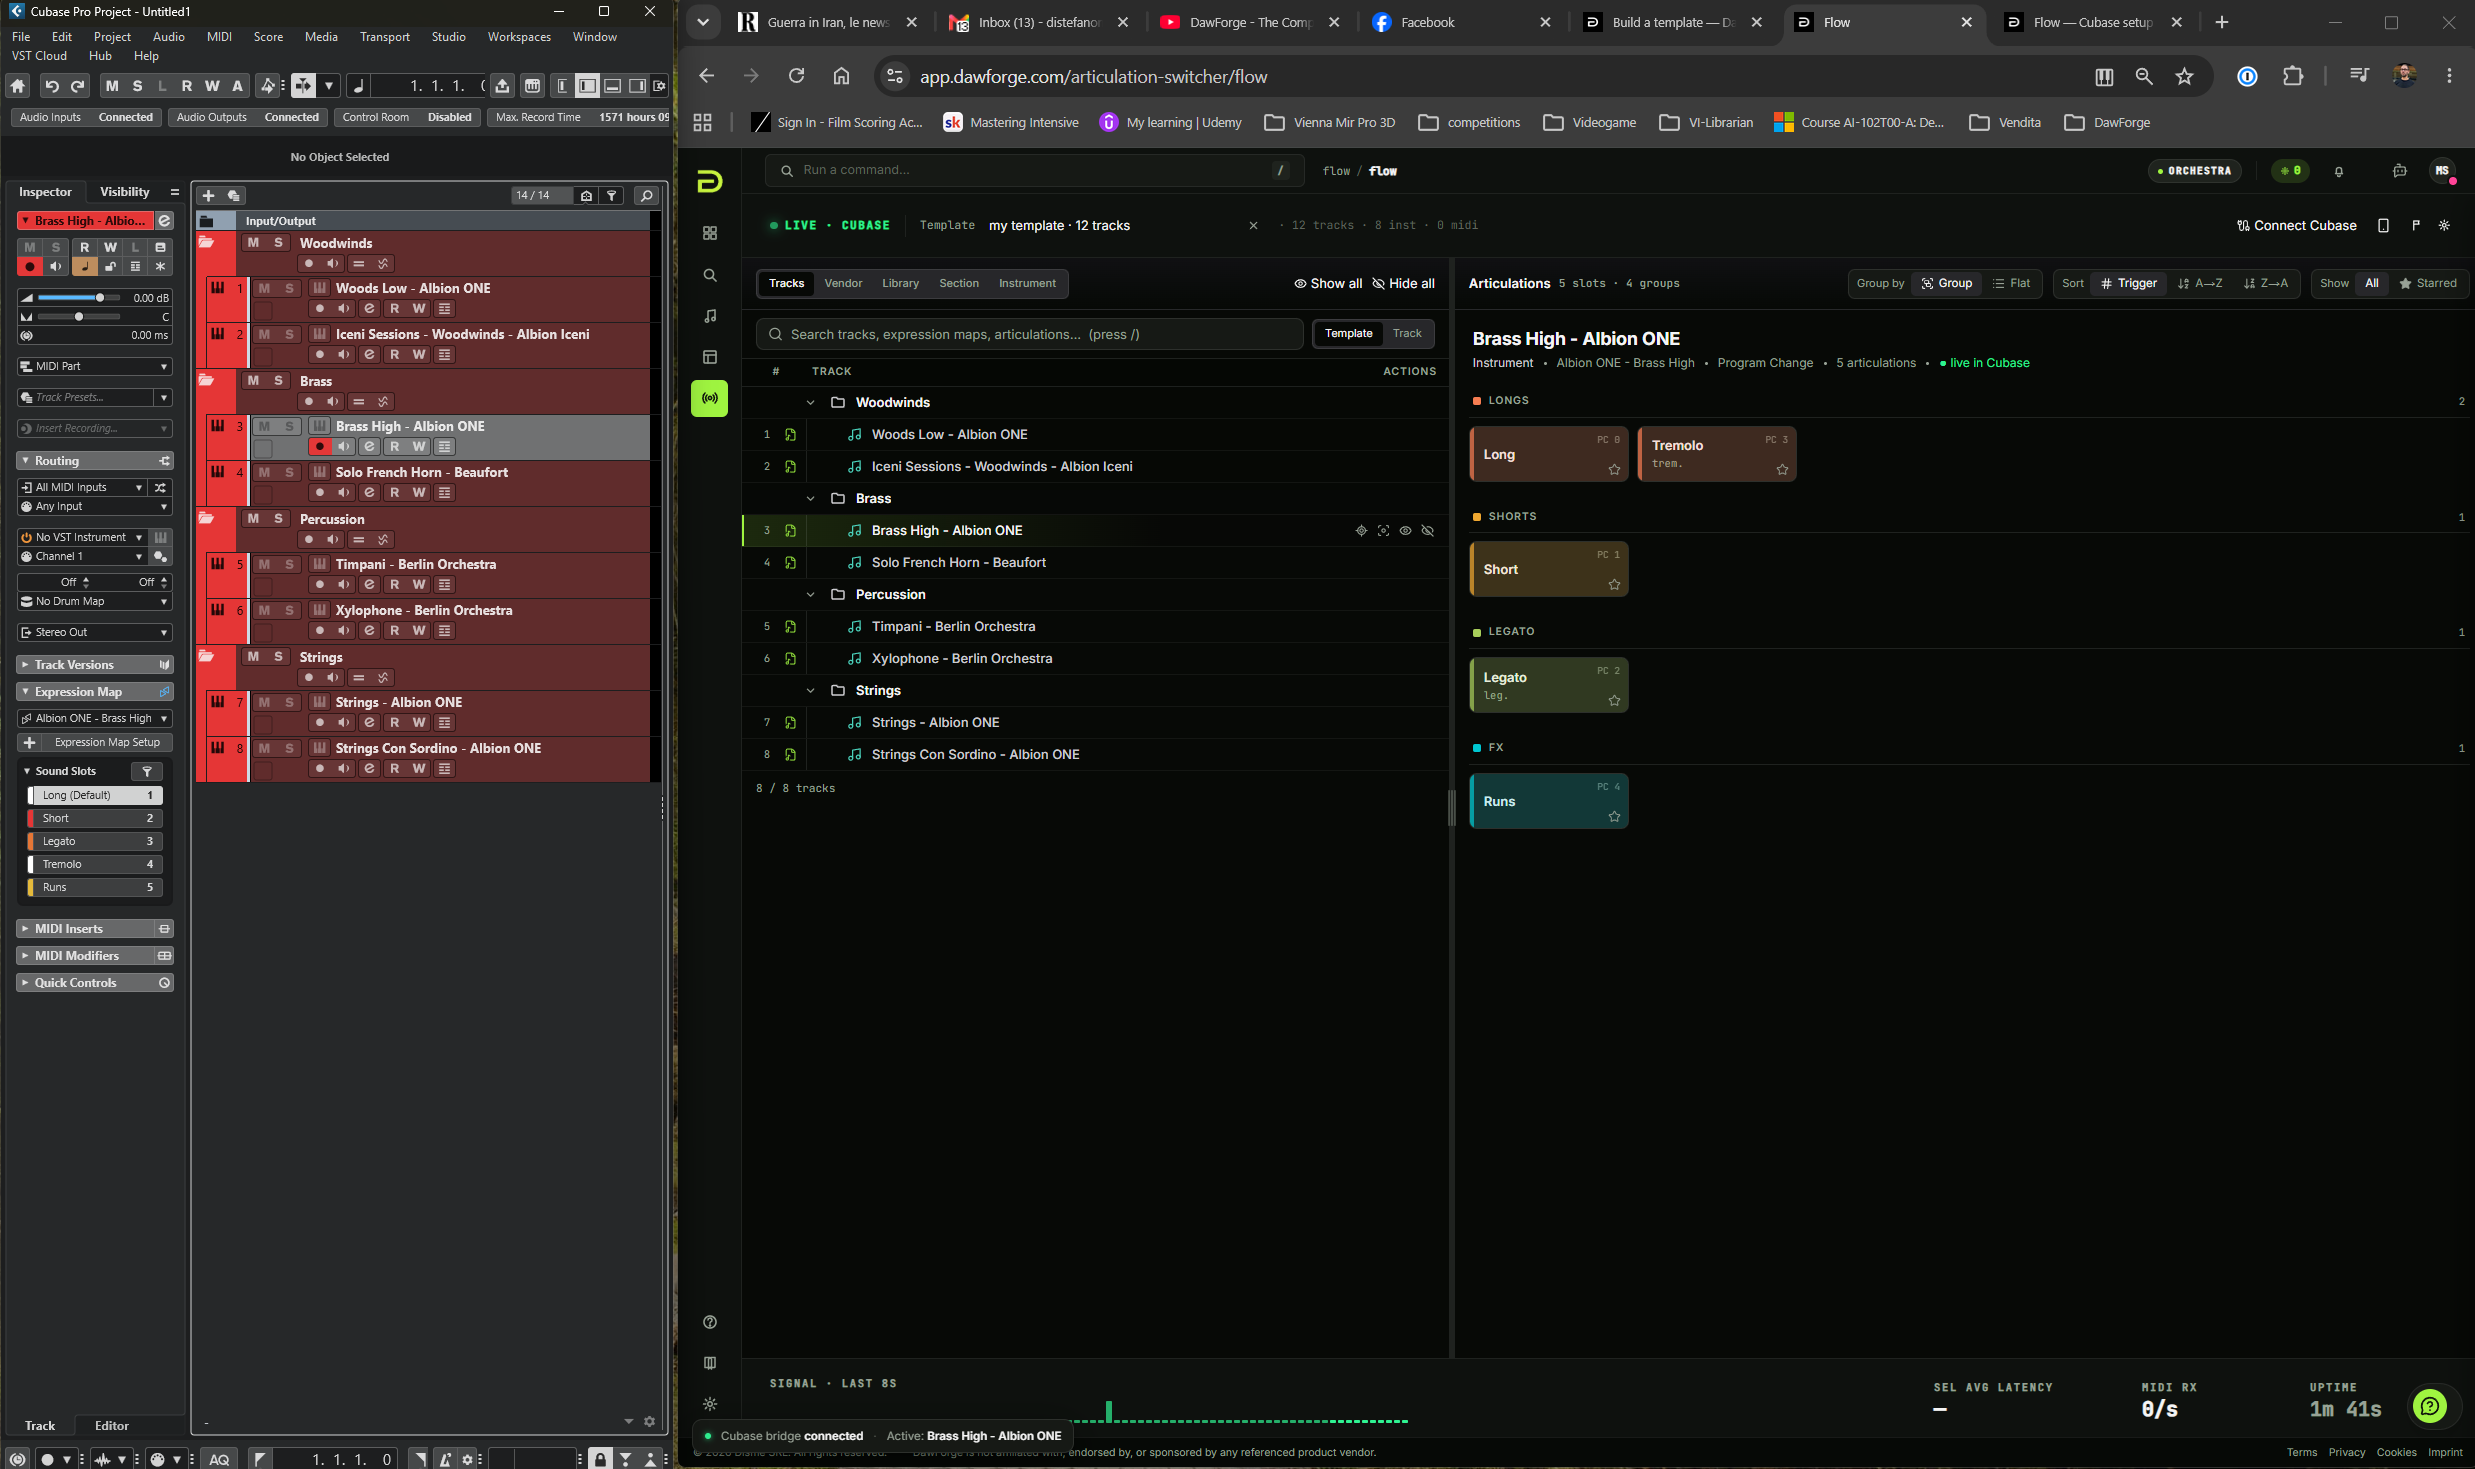
What each Flow action does to Cubase
| Action | What happens |
|---|---|
| Click a row in the rail | Cubase selects that track — at any distance, even if it's hidden. |
| Click an articulation cell | Sends the articulation's switch (keyswitch / CC / program change) to the selected track. |
| Solo | Leaves only the current track playing. Similar names are handled, so "Violins I" doesn't drag in "Violins II". |
| Show | Un-hides matching tracks — works on hidden ones too. |
| Hide | Hides everything except matching tracks. |
After you change a template
Whenever you re-import or rebuild the template (renamed track, new folder, swapped a map):
- In DawForge, open Connect Cubase → Install presets again — it refreshes the
DawForgefolder in place. - Cubase picks up the new presets live; Flow shows the new structure on its next page load.
Verify it worked
Pick any track in the Flow rail — including hidden ones nested deep in folders — and Cubase selects it. Articulation cells fire and your library responds. Solo / show / hide collapse the project cleanly.
If something went wrong
Disconnectedstatus → the Cubase link is broken. See Install and connect Cubase.- "Bridge out of date" banner → we shipped a newer bridge than the one you have installed. Click Reconnect in the banner to reinstall the latest bridge (Connect Cubase → step 1), then restart Cubase.
- Connected but track selection does nothing → the presets aren't installed, or the names don't match. Open Connect Cubase → Install presets again.
- Articulation grid empty for a track → that track isn't linked to a patch. Open the template page and link one.
- Selection works but feels slow → known with very large Cubase projects under heavy CPU. Close inactive racks and give Cubase more headroom.
- More fixes → Flow troubleshooting.
Next
- Mobile companion — drive Flow from your phone.
- Flow on Logic (beta).